Showing posts with label craft projects. Show all posts

Wednesday, October 2, 2019

Environmental-Friendly Christmas Shopping


It's never too early to start your holiday shopping. When you're on summer vacation and you see something that reminds you of someone, maybe that's a good present for their next birthday or Christmas? One of the best gifts you can give is experiences or your time. If this is not an option, the following are some great ideas.


  1. Metal straws - plastic straws are horrible for our environment. If you have people you need small gifts for (i.e. teachers, babysitters, house cleaners, etc), buy metal straws in bulk and split into smaller packages for everyone. If you get them in pouches or cases, even better - they can be kept in purses whenever needed in restaurants or drive-thrus.
  2. Homemade napkins - If you have a little time to make gifts, how about a set of homemade napkins? You could pick out a fabric color that matches their decor if you're really motivated. Or buy Christmas fabric so they will have festive holiday napkins. Or, if you want to emphasize enviro-friendly, use fabric scraps you already have around the house. Hem them for clean edges, or cut and wash for rough edges. Fold them and wrap with ribbon. 
  3. Shopping bags - if you are like me and have lots, perhaps include this with another gift (or use with a food gift basket).
  4. Sew gift bags - This requires a bit of time, but it's the gift that keeps on giving. Bonus points if you use fabric you have on hand. Make variety packs: big, small, rectangle, square, etc. If you're like me and like to buy after Christmas, buy fabric and start making gift bags to give next year.
  5. Food - another great way to not give STUFF is to give food. Make a themed gift basket with things they like (i.e. popcorn, bbq, chocolate, coffee, ice cream sundae's)
  6. Reusable sandwich bags or wraps - especially families who pack lunches, can use these. I have found wraps tricky to sew, so prefer to buy them. But if you have a good sewing machine, you just need a heavy-duty needle, outer fabric, liner fabric and velcro. Here's one example of sewing instructions: https://www.sisterswhat.com/2019/07/diy-reusable-sandwich-bag-wraps.html
  7. Homemade greeting cards - If you have children who love to draw or paint, turn their art into greeting cards. Grandparents love these! I buy large quantities of blank greeting cards and either draw/paint directly on them or glue photographs to the front. Leaving the inside blank makes them more 
  8. Homemade heating pad - You can buy millet in bulk and sew a long, rectangle of fabric and fill with millet. This heating pad just requires a minute in the microwave. 
I will keep adding to this list, so check back again later! 

What else can you think of to share with others? Please comment so we can all have even more ideas :)

Monday, July 13, 2015

Doll Ring

Here's a craft you can quickly make for your American Girl doll.

All you need are brass fasteners, jewel pieces and a hot glue gun.


Glue a gem to the top of the brass fastener:


Open fastener and wrap around doll finger. Here's how it looked on my pinkie (sorry I didn't get the pic clearer)


Quick and done!


Wednesday, July 1, 2015

I Love You to the Moon and Back

This year's DIY Father's Day present was quite a success!


Supplies:
  • Canvas, poster board or heavy paper
  • Blue and black washable paint
  • plastic plate or paint palate
  • scrap paper
  • double-sided tape or masking tape
  • wooden skewers
  • wooden popsicle sticks
  • printer photo paper
  • hot glue gun, regular glue
  • silver glitter (optional)

  1. Cut out a circle of  scrap paper and tape it to your canvas, using double-sided tape or a loop of masking tape underneath. You could trace something round to get a good circle (measuring cup, glass, masking tape roll, etc)
  2. Mix blue and black paint on your palate until you have a night-blue color you like. Let this dry.
  3. Pose children in a climbing position against a white background. We had them step up on our white stool so as to not see the floor in the picture. Take a picture of each child you will be including.
  4. Print pictures and cut out.
  5. Create the ladder. First we trimmed the skewers to fit the size of our canvas. Next, we hot glued them vertically on the canvas. 
  6. Hot glue popsicle sticks across skewers as the rungs of your ladder. We also laid our people in place to figure out where to position the rungs. 
  7. Glue people to the ladder.
  8. If you like the idea of stars in the sky, brush some glue across the top and sprinkle glitter.
Don't forget to sign and date your artwork!


Upcycling old crayons

I've always wanted to try making our own molded crayon chunks. Well, it was one of the most successful projects of the summer in several ways.

First, we got out our big tub of crayons and sorted out all the tiny stubs. Great job for the kids to do on their own.

Secondly, the kids got to peel the wrappers off all the crayon stubs.

I broke crayons into smaller pieces wherever possible.

Finally, the kids got to fill the (greased - don't know if it's important or not) muffin tin with whatever combination of colors they wanted to create.

The next step is thanks to the hot summer sun.


We set the muffin tin out in the sun on a 90+ degree day and voila!


Popped right out of muffin tin after they were cooled. Melted crayon chunks.


Nice and big, easy for small hands to use.


Thursday, August 7, 2014

Teacher Appreciation

So the school year comes to a close and I am scrambling to put together appreciate gifts for teachers. I scour Pinterest primarily, and came up with gift basics of goodies. Here is my collection:


A snack-size ziplock filled with M&Ms and a card attached:


I happened to have a bunch of cool-colored paper clips, so I bagged these up with a card reading: "Thank you for holding everything together!"


Doesn't everbody need a little fun, too? We added some silly string (Goofy String from the Dollar Store) just cuz...


Got some highlighters? Add a card reading: "You were the highlight of the year!"


I made flower heads from cereal box cardboard (although I'd recommend something heavier next time). My daughter decorated it, then we duct taped it to a skewer.

  
We glued Dove chocolates to each flower petal. Because what teacher can't use a little more chocolate??


Whatever various school supply surplus I had, I added in:


We gathered everything into a cute Dollar Store bucket:

Thursday, February 13, 2014

Valentine Garland

Here is a simple garland you can make with your preschooler.

Cut a set of small colored papers. Decorate them with whatever you have - glitter, stamps, stickers, etc.

Punch a hole in both top corners of each page.

String ribbon through them all and hang up.

Simple!

Tuesday, February 11, 2014

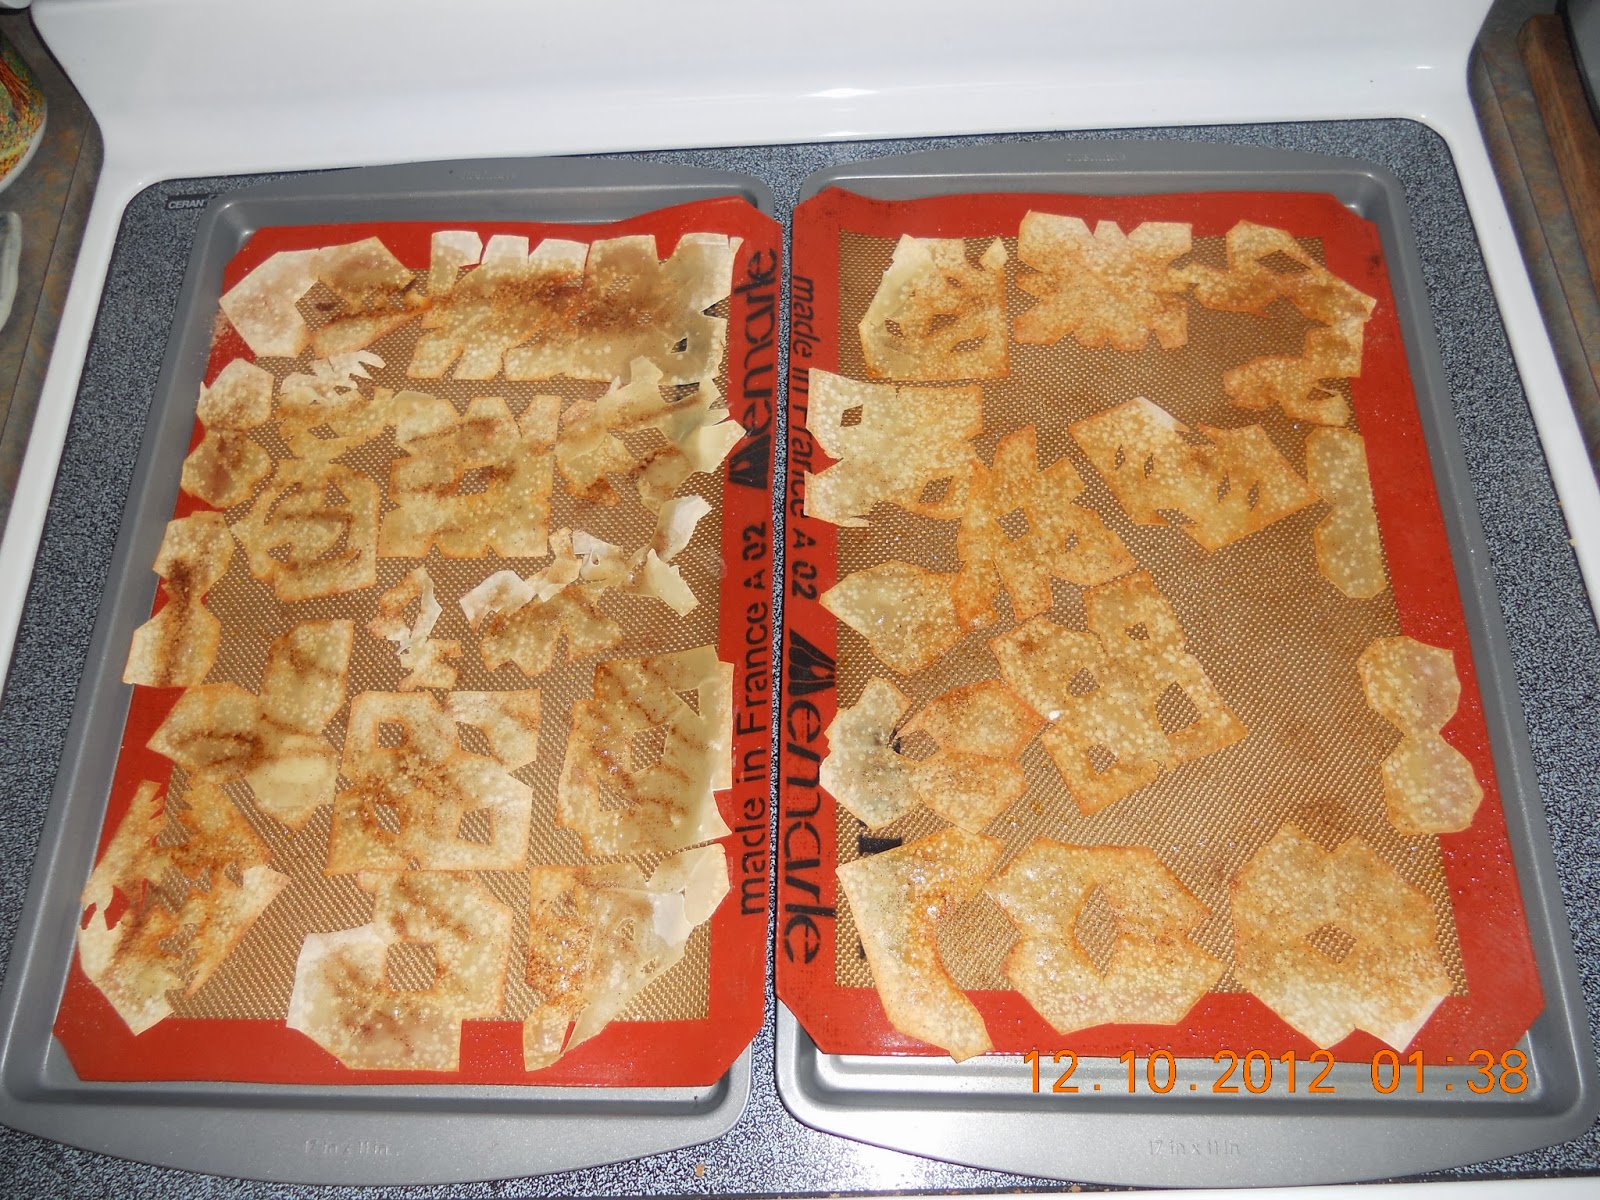
Wonton Art Turned Snack

There are so many things you can do with wonton wrappers beyond making wontons. You could fill them with all kinds of things from making raviolis to meatballs, seal the edges and bake.

Edible Crispy Snowflakes
This was a great activity for my kindergarteners when friends were over to play on a winter day. Square-shaped wraps work great for folding into a triangle once and maybe twice. Use scissors to cut into snowflake shapes however you wish. You can also forgo the folding and simply cut as you desire. Either way, cutting with food is fun for kids!


Spray lightly with cooking spray, then sprinkle with cinnamon sugar.


Bake @ 350 for 8-10 minutes - but keep an eye on it, as it can go from lightly brown to burned fast!


Once finished, the kids get to eat their art! A crunchy, lightly sweet snack. 

Monday, January 20, 2014

Bronco Fever!! Homemade Custom Shirts!!

 
Being a proud Broncos fan for years, I'm always keeping my eye out for a shirt at the thrift store or on clearance. Sadly, they don't ever seem to become cheap after the season finishes. And now, with the Super Bowl coming up, I was determined to get my own shirts. Here's what we did:
 
I searched the internet for free clip art, broncos logos, and followed all kinds of links to find what I wanted. I saved a folder of images. Then I found shirts we already had in the house for myself and my girls (plus one last-minute trip to thrift store). We had a package of "iron-on transfer" paper for our printer. It is a bit pricey, but the package of 6 sheets is much cheaper than buying new shirts!
 
I printed up all our pics, put them on our "upcycle" shirts, and now this family of Broncos fans have new gear to sport on February 2! Gooooo Broncos!!  :0)
 

Monday, January 13, 2014

Princess Belle Birthday Cake

Finished Princess Belle Birthday Cake
Here is the Princess Belle Birthday cake I made for my daughters' 6th birthday.

Thanks to a cake decorating class, I had the skills to make a few of the pretty extras. You could always buy the flowers in the cake decorating aisle of a craft store and stick them on with icing, so don't be intimidating by this if you don't have any formal cake decorating skills.

I started by making my boxed cake mix and pouring into one round pan and baking part of it in a pyrex mixing bowl. I am still a novice, so you can see I had some trouble getting my bowl piece just right.

(L) my pink flowers, which needed to dry out overnight first; (c) bowl cake piece; (r) round cake


While my two cake pieces were not perfect, the best way to fix cake mistakes is icing, icing, and more icing! Fill in all your holes, smooth out the rough sides, whatever you can.

Next, adding your doll. I was lucky that I had a Belle doll that had clothes painted on. I was able to saran wrap her body and simply put her down into the middle of the cake. If your doll needs clothing added, you may need to dress her and then wrap in saran wrap. Experiment to see what works best.


I added extra flowers in the end to cover this up. I also squeezed extra icing around her legs to hold her steady in the cake. As you can see, my Belle ended up being taller than I had predicted for my cake. In the end I added extra flowers to resolve this.


After icing the cake, I "glued" all my flowers on with icing and added more flourish to pretty up her dress. My little princesses were happy with the cake and I was pretty proud.

Family Thankful Tree

When Thanksgiving rolls around, it is traditional for a lot of people to spend extra time thinking of all the things they're thankful for. This year I decided to make a Thankful Tree.

I have saved a good stash of the brown paper used in packaging. It worked well for making a tree trunk. I then ripped it into stripped and let my kids twist it and tape it on the wall for branches.

Our family's Thankful Tree


close up of our bag of leaves

I collected some of my kids paintings and traced their hands all over it. Together we all cut out the hands. We gathered them all into a bag I taped at the bottom of the tree. Whenever someone wanted to recognize something they were thankful for, we'd grab a hand from the bag, write on it and tape it onto a tree branch.
 
I'm sorry I forgot to take a picture of the tree full of our thankful branches.

Upcycling Cereal Boxes

When my imaginative daughter asks me to do a craft project, I often hesitate and think of all the chores I need to finish. But this year during our Christmas break I was full of creative energy. She clearly hit me during one of my more creative moments, when she asked me to make her a laptop. And how wonderful that my daughter thought so highly of my skills, to even ask, right? So here we go...

laptops, closed

A small priority mail box and a cereal box are perfect size for a laptop. The priority mail box even has a perfect closure already. With a cereal box, I just use an exacto knife to slice one cover leaving one edge in tact. I wrapped duct tape around all the cut edges. I also used it to tape white paper inside the cover as the screen. My children enjoyed drawing their "desktop icons" on the screen.

laptops, opened
I keep miscellaneous pieces of cardboard around, and this was one of those days when I had a use. You'll need to tape something across the open cereal box, to lay the keyboard on top of.

Now, to add the keyboard. You can find numerous templates on the internet to print. The one I used was  http://typingforchildren.com/printable-keyboard.html. Printing about 70% gives about the right size for the boxes I used.

If you look closely below the keyboard, you'll see my mousepad created from a square of duct tape. But if your child wants a traditional mouse and you can find a spare one in your house, you can easily create a USB hole on the side of your laptop to "plug in" the mouse.

The funnest part was after these were finished and my girls sat across the room from each other typing and sending emails to each other. Adorable!

Homemade Rapunzel Hat/Hair

Close up of hat made for Kelcie. Bling includes an applique "K."
Full view of Kelcie's hat.


These hats were super easy to make. I purchased basic kid winter hats. Then I searched the sewing section and found a handful of cute applique "bling" that I hand sewn onto the hat. Since I was making these for my twin daughters, I used an applique "H" and "K" to denote their names. Finally, I purchased a skein of bright yellow yard for the braids.

 After hand sewing the appliques to the hat, I started working on the braids. I started with about a 3-4  foot length (if you make it long enough to touch the ground for your child, it can serve as a scarf wrapped around their neck) and wound it back and forth until I had a very thick section to work with, that I thought would give me 3 fat braid sections. I used a small piece of the yellow yard to tie one end altogether. Then I cut the loops at the other end and separated into my 3 braid pieces and got braiding. I simply tacked down the braids to the inside of the hat to attach them. Viola!

younger sister loves the extra long hair!

My girls demonstrating how the long braids can be used as scarves!
 
 
Kelcie showing how fun the braids are for twirling!